 +38 050 355 22 70
Why can liquid wallpaper swell? Part two. Preventive measures and methods of correction
In the first part of our article, we examined how the very phenomenon of the appearance of bubbles on liquid wallpaper, its possible manifestations and causes. And now, we will figure out how to make sure that we do not encounter this phenomenon, well, and if we do, then how can this situation be corrected.
How to avoid possible bubbles?
Most often, evaluating the amount of work for applying liquid wallpaper, we see a ready-made putty on the object. How can you know if the surface has been properly prepared before applying it? After all, it may happen that the preparation was done either a very long time ago, or even without your participation!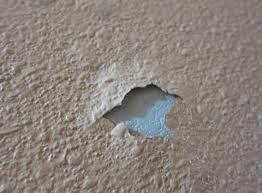
We recommend inspect and selectively tapping the surface of the gypsum putty. The sound of emptiness under putty is quite easy to recognize.
If you find it, break this fragment and try to understand if it is local or if the entire putty layer is prone to peeling off. If the latter, then by removing it and replacing it if necessary, you will already save both time and money in the future. If the delamination is local only, then after removing it, cover with primer this fragment and re-putty it. However, keep in mind an important point - be sure to wait for the complete drying of the primer, and the complete drying out of the putty.
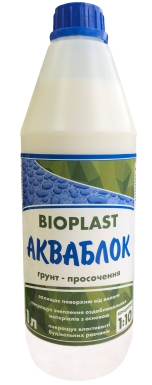 If at the tapping stage you did not find any delaminations, but suspicions of its unreliability still remained, then there is another option for guaranteed application of liquid wallpaper without bubbles. We will make the surface of the putty impervious to water. To do this, we use a concentrated primer-moisture insulator AQUABLOCK trademark BIOPLAST.
1. We apply the first layer by diluting it with water in a ratio of 1:5 and waiting for it to dry completely.
2. We apply the second layer without dilution, and also wait for complete drying.
As a result, we get a slightly sticky film on the surface, impervious to water. Right over it, we apply liquid wallpaper. Even if the putty has a tendency to swell, by isolating it from water, we will not allow this tendency to manifest itself.
Swelling correction
If only one or two, bubbles have formed on your surface, then in this case you can get by with local repairs.
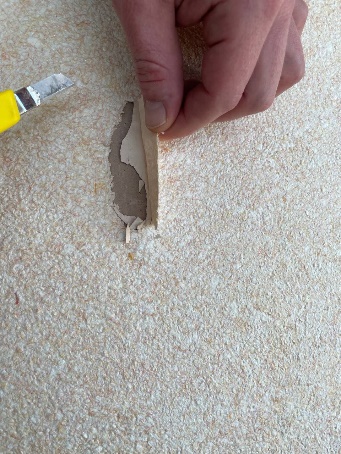 1. Cut the bubble along the contour. The easiest way to do this is with a craft knife.
2. Completely remove all exfoliated fragments of putty and clean it from crumbling fragments. If there are fragments of unremoved whitewash left - carefully, completely wash it off with a wet sponge. Dry the washed area.
3. We process the entire cleaned surface of the delamination with undiluted primer-moisture insulator AQUABLOCK from BIOPAST.
4. If the edges of the cleaned surface also tend to peel off, coat the edges of the area with an additional layer of undiluted AQUABLOCK moisture insulating primer.
5. Wait for the primer to dry completely.
6. Smooth the area with putty. After it dries, cover it again with undiluted AQUABLOK moisture insulating primer.
7. Restore the liquid wallpaper fragment.
If the occurrence of bubbles is massive, then such a surface must be completely redone. In other words, the wallpaper and peeled putty are completely removed. Those places of putty that have not peeled off also need to be removed, because. they can cause problems in the future. The surface is prepared according to technology, depending on its type and condition.
I would like to emphasize separately that if all the stages, without exception, of the preparatory finishing work are carried out strictly according to the technology, then the occurrence of bubbles is impossible. Bubbles are the result of a violation of surface preparation technology.
Prepare the surface properly, follow the manufacturer's instructions for the material being used, and use approved products. Do this and you will never make mistakes in preparation.
We wish you easy work and excellent results!


